I wanted to make something special with the fabulous silk/merino yarn I got at the fingerlakes fiber festival. I didn't have enough yarn for anything big so I made a hat which is perfect with the supersoft yarn; the braided cable is a variant of one I found in one of the Harmony guides I borrowed from my guild.
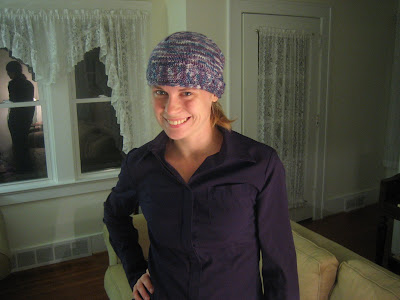
yarn: Steam Valley Hand Dyed Silk Yarn, the hat weighs 53 grams which is slightly more than half the skein
needles: size 8 (16" and dpns)
gauge: 4.25 stitches and 6.5 rows per inch in stockinette
Pattern - I'm new to pattern writing so please let me know if this is easy to understand and if it turns out how I describe.
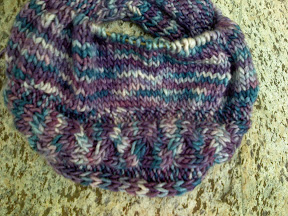
First I made the headband with an i-cord edging and braided cable. Then I grafted the edges of the headband together and made sure it fit over my head. Next, I calculated gauge in stockinette and measured the circumference of the headband to figure out how many stitches to pick up for the body of the hat. I picked up stitches from the top of the headband and knit in stockinette until it was time for the crown decreases. Since the theme here is braids and braids are usually done with 3 strands, I made the decreases at even thirds with 3 purl stitches between each set of decreases.
headband: provisionally cast on 15 stitches. The braided cable is over 6 stitches, there are 3 purl stitches on either side of the cable, and there are 3 i-cord stitches on the right hand side if you're looking at the right side of the knitting. The idea is:
(RS) PPP KKKKKK PPP KKK
(WS) KKK PPPPPP KKK sl3
I usually slip purlwise so the loops are correctly oriented for untwisted knitting on the next row but do whatever you need to keep the i-cord stitches untwisted. Also, make sure you carry a lot of slack for the i-cord - if it's too tight, it won't fit over your head. My i-cord is slightly tighter than the rest of the headband which helps the hat fit snugly but comfortably.
In purple, are the stitches for the braided cable. Cabling will only happen on RS rows and I used the no-cable needle method - I'm linking to the tutorial Grumperina wrote because it's the one I learned from but there are many many tutorials available.
cable pattern:
row 1: K6
row 2: P6
row 3: C4L K2 (the first 2 stitches cross left in front, the 3rd and 4th cross right in back, knit the last 2 plain)
row 4: P6
row 5: K6
row 6: P6
row 7: K2 C4R (knit the first 2 stitches plain, the 3rd and 4th cross left in back and the 5th and 6th cross right in front)
row 8: P6
Work the headband with the 6 stitch, 8 row cable pattern and i-cord edging until it goes around your head. Mine measured 23.5 inches when it was slightly stretched. If you can, try to end after row 8 of the cable pattern so when grafted, the braid is uninterrupted. Graft all the stitches together as they come in reverse stockinette, stockinette, or i-cord. For the i-cord, I grafted on the knit side and wove the end into the center so the i-cord curled around.
calculate number of stitches to pick up: try on the headband where you plan to wear the hat and measure the circumference at the i-cord. Mine was 23.5 inches and my gauge was 4.25 stitches per inch.
23.5 * 4.25 ~ 100 stitches
I placed markers at 4 equal intervals and picked up 25 stitches between each marker on the opposite side than the i-cord (this is the left side on my little chart above).
body: now that your stitches are picked up, knit in the round until you are ready for crown decreases (about 2.75 inches of stockinette or 4.75 inches from the i-cord edge). I always make my hats on 16" circulars and without removing the needles try it on often - I know it's time for crown decreases when the hat is long enough to cover my ears and the stitches don't fall off the needle at the top of my head.
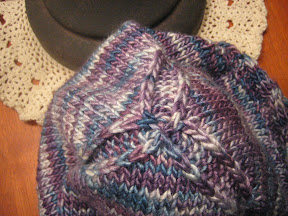
crown decreases: I decreased 6 stitches per row by decreasing 2 stitches every row at 3 places.
Place 3 markers evenly to mark the decreases. (between markers, there will be 33, 33, and 34 stitches - I don't worry about the one extra stitch - it gets an extra decrease on the almost last row)
row 1: [K26, K2tog, P3, SSK] repeat 3 times until end of round.
At this point I usually ditch the markers since the purl stitches scream *decrease* at me.
row 2: [K24, K2tog, P3, SSK] 3 times
continue decreasing in the same places every row until there are 15 stitches left (they should be PPP KK in each of the 3 sections)
last row: [P3tog, sl1 k1 psso] 3 times, there will be 6 stitches left - break yarn, thread a darning needle and run the yarn through remaining stitches twice, weave in ends.

If anyone makes this - comment with a link to a picture so I can see what they all look like.
I originally posted this entry and pattern on my other blog stringtheories.wordpress.com